So...
I'm building a framework to hold some solar panels to power me the length of the mighty Murray River, and I figure I should mount the entire assembly on hinges so I can lift one side at a time to add the extension tubes to raise it up high when I'm on a long trip so I can use the space under it to sleep or whatever.
The panels were originally going to be mounted on hinges as well so I could tilt them to the sun as required, but I figured I'd keep it simple and see how much cruising time I have per day without moving them. I can always add hinges later.
One of the problems I have is that I'm using three or four different metals in a potentially salt water environment.
Metals hate that kind of thing.
They have a problem with nobility.
It turns out that if you arrange a stack of metals in a particular order based on something called their nobility, and you pick some that are a decent distance away from each other on that list and try to build a boat out of them, you get a battery, and some stress.
I already have the stress, and the battery doesn't even exist yet.
And by the way. Where're not talking about some awesome battery that will be useful, but the kind of battery that used to be around in the 70s in your transistor radio left in a cupboard in your room, and that was left un-attended for too long and decided to go all acid all over the shop and make your mum angry because you didn't own clothes any more. It seems when you stick two metals that are far from each other on this table of noblenessso they touch each other, and then wet them with some electrically conductive liquid...say... salty water, they get all crazy and dissolve each other and basically ruin your boat.
Sometimes ruining your boat includes letting go of solar panels while you're driving to the water at high speed, and that is the very thing I'm trying to avoid.
I have stainless hinges, painted iron grow house tubes for a frame, nickel coated nuts and bolts, and aluminium frames on my solar panels.
Lucky me!
I bought some rubber grommets because the guy at Bunnings told me to, and said everything would alright. He was the one who sold me the hinges, the nuts and bolts, the grow house (two years before) and all the tools I needed. He was very reassuring.
But just in case he had no idea what he was talking about, I paid some drunk guy with a boat shaped voodoo doll to make everything better, so I should be good.
At least he claimed his boat shaped thing was a voodoo doll.
Whatever.
I'm sure everything will be fine.
120 Things in 20 years needs all the magical help it can get to prevent becoming unhinged, and/or zombieism.
Showing posts with label grow house. Show all posts
Showing posts with label grow house. Show all posts
Aquaponics - Tomato
It's cold and rainy here in South Australia, and I keep picking tomatoes.
Winter isn't a good time for tomatoes, but mine seem to be having fun anyway.
My four tomato plants that are growing so their roots are suspended in the fishtank water seem to be fruiting a lot later in the season than they should be. The plants are out in the cold, but their roots are inside the fishtank which is inside a little growhouse.
 The plants look like this.
 And they are still doing a lot of flowering.
 And there are plenty of fruit all over the vines.
 And the fruit are still ripening.
These were today's pickings.
Not many today, but there are always some. And a few didn't make it inside.
And there are a lot more on the vines that are nearly ripe. Ripe enough to eat.
All these pics were taken today. It's winter in the southern hemisphere, so the tomatoes should have stopped fruiting a while ago.
It's strange that they are still growing and fruiting this late. Strange enough that I thought I'd contact someone from one of our universities. I remember someone from my research into bees, who was working on growing native bees to pollinate tomatoes. I'm not sure if there were a bee person or a tomato person, but I emailed them in the hope that if they don't care, they might know someone who does.
It might save the industry a bit of money if it turned out the entire plant didn't need to be kept warm to keep them fruiting.
120 Things in 20 years says to be on the lookout for tiny hot houses with tomatoes growing out of PVC tubes, coming to a winter tomato farm near you. Or not.
Winter isn't a good time for tomatoes, but mine seem to be having fun anyway.
My four tomato plants that are growing so their roots are suspended in the fishtank water seem to be fruiting a lot later in the season than they should be. The plants are out in the cold, but their roots are inside the fishtank which is inside a little growhouse.


These were today's pickings.
Not many today, but there are always some. And a few didn't make it inside.
And there are a lot more on the vines that are nearly ripe. Ripe enough to eat.
All these pics were taken today. It's winter in the southern hemisphere, so the tomatoes should have stopped fruiting a while ago.
It's strange that they are still growing and fruiting this late. Strange enough that I thought I'd contact someone from one of our universities. I remember someone from my research into bees, who was working on growing native bees to pollinate tomatoes. I'm not sure if there were a bee person or a tomato person, but I emailed them in the hope that if they don't care, they might know someone who does.
It might save the industry a bit of money if it turned out the entire plant didn't need to be kept warm to keep them fruiting.
120 Things in 20 years says to be on the lookout for tiny hot houses with tomatoes growing out of PVC tubes, coming to a winter tomato farm near you. Or not.
Aquaponics - PVC Tube tomatoes
My PVC tube tomato now seems to be growing at full speed.
 There's stacks of new growth every day, and the first of the tomato flowers are just starting to form.
That should really read "the first of the tomato flowers since I cut all the existing flowers and leaves off, so that I could jam it into a PVC tube, are just starting to form".
The entire point of the exercise was to get the tomatoes outside where it could grow as big as it wanted without taking up all the space inside, but it looks like the entire system is about to be outside.
The grow house isn't UV stable, and as a result is turning to dust every time I so much as look at it.
Even a sly sideways glance from a distance sees yet more daylight induced destruction.
The hardware chain I bought it from will probably replace it, but this is my third one from them and I'm starting to wonder if they really care about the percentage of my life I spend dealing with a product that really shouldn't give any problems.
Any % of life spent at a returns counter, is too much %.
Aquaponics - Algae eating suckfish death
The smaller of my two little algae eating fish died today.
 It always looked a little off, and spent a few hours swimming upside down in the days after I first put them in there, but has since looked happy enough. I'm wondering if it got too cold for it. I was told they were happy in unheated water, but perhaps if it was already a bit sick...
The temperatures in my system, have been down around 10c the last few days.
I have a really bad cold, and have totally failed to seal up all the gaps in my grow house due to spending every spare minute of my life in bed. Those gaps include one big enough for me to get through.
I'm also not sure that this grow house really works. Even when it was first installed and was in the standard layout, it never seemed warm. I think I might need to investigate going back to a clear plastic version.
The other potential problem is that the relative size of the fish tank to the grow house means it acts as a massive heat sink, and takes 5 degrees of air temperature gain and turns it into 1 degree of water temperature gain. From memory, water has 5 times the thermal capacity of air, so that might be a large part of the problem.
In other words, a big grow house can heat a little fish tank, but a small grow house can't heat a large fish tank.
120 Things in 20 years discovers that sometimes an aquaponics algae eating suckfish can get dead due to a large thermal mass in your grow house (or something else). Who knew.
Aquaponics - System build
I made a bit of an improvement to my aquaponics system.
It went like this...
 I started with one of these.
It's commonly called an IBC or International Bulk Container/Carrier.
They are used to freight liquid stuff all over the world, and there are a lot of them.
If you don't normally, wander down to your local dockyard or industrial/freight area, and you will be particularly amazed by two main things. First that we realy burn a lot of fuel in a lot of trucks, ship, planes, and trains, and second, we use a lot of containers to move all the stuff that we burn all the fuel for.
Many containers are used only once.
Mine brought honey from somewhere, and even has a heating element under it.
I bought them ages ago in a previous life on a farm.
It's a strange and disturbing thing to discover that we humans make single use containers with mains power cords protruding from them.
It's a little bit wrong me thinks.
But anyway, reusing one for an aquaponics system has got to be a good thing, and a lot of people have done so.
That thing leaning against it is my SLO or solids lifting overflow. Or at least that's what it will look like when I make it.
The point of it is to move the solid fish waste from the fish tank(where the fish don't want it any more because it smells and tastes bad), to the grow beds (where the plants would quite like it). A SLO is another thing that a lot of people have used.
A lot of people are very clever.
I know some of them.
I even call some of them friends.
I'm friends with clever people.
Which is nice.
So...
 the plan was to squeeze a one and a bit cubic metre fish tank into a 1.8 cubic metre grow house, and still have a stack of room left over for growing stuff.
In fact the ultimate goal was to squeeze a one and a bit cubic meter fish tank into a 1.8 cubic metre grow house, and still have 1.8 cubic metres of space left over to grow stuff in.
Tricky.
 But by bending space and using a roof for a wall, I nearly managed it.
All I need now is something to wrap the bottom of the new fish tank in and nobody will be the wiser.
I think it looks better than the original, but that could be a dehydration issue.
It's really hot.
Or at least it's really hot in a growhouse when you are trying to fit big things into small spaces.
 One of the problems with using a honey freighting container is that it's difficult to get the honey out.
That's why you need a heater.
Heat makes honey runny.
Heat makes fish runny as well, but it doesn't taste so good afterwards.
So to make it so I could get the fish in and out, I drew a rectangle.
The best thing about drawing rectangles is that, once done, you can use the drawing as a guide to get a power saw involved.
 But the close cousin to the power saw is the hole saw.
I cut a hole as a thing to put your thumb in to act as a handle.
This rectangle is going to be a door soon.


I also drilled another hole along the line so I could put a jigsaw blade in to start the cut.
And then a few more holes to allow me to tie some fishing net mending line through to form a hinge.
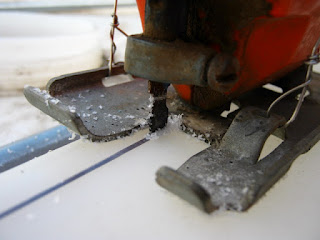
 See the tape and stainless steel wire holding the entire thing together.
I did that.
It nearly cuts straight!
Nearly.
 I've had this jigsaw for longer than anything really long.
And it still works.
But it's really loud, and shakes a lot.
Some would say the bearings are shot, but I say the name says it all.
It's meant to jig, and jig it does.
 After a few hours of jigging, it started to look like this.
 It turns out IBCs are made of slightly sterner stuff than I first thought.
Not much sterner, but slightly.
The plastic is thicker than I thought, and less brittle.
It needed a little support to keep the jig saw from creating a friction fire, but it was easily dealt with by the addition of a trusty stick.
I choose a milled quarter round stick.
 After what seemed like hours, the hatch was finally cut.
I suspect it seemed like hours because it actually was hours.
Apparently, after 20 years or so of frequent use, it seems it's best practice to buy a new blade.
Who knew.
Luckily, as mentioned previously, I strive for second best practice.
 Here's a photo that doesn't really contribute in any way.
Oh hang on, yes it does.
It shows the newly revealed inside of the fish tank with the hatch sitting on the top.
 A 30 second scrape with a file smoothed all the rough edges.
One of the best things about working with plastics is how well all your tools work.
Even sand paper is satisfyingly productive to use.
 I found myself walking on the leftover cut outs from months ago when I cut the NFT holes, so thought I'd use one as a latch to stop the lid from falling though into the fish tank when I close it.
String.
 Now it looks like this when the lid is closed.
The point of the lid, is partly to give me some control over evaporation, but mainly so that I dont need to fish about with a net all day whenever I decide to foolishly use the top of the IBC as a work bench.
 When I try to use the top of the IBC to put stuff on, the lid will force me to close it in order to get to the nice flat space behind it. The lid sits at 90 degrees, when open, because it rests against the frame of the grow house.
That's the frame just under the brand name.
The 90mm PVC pipe with the elbows on each end are to gently introduce the grow house fabric to it's new shape.
I used cable ties to connect the PVC directly to the IBC frame.
That should give a ton of security to the growhouse in windy weather.
 It took an hour and twenty minutes to fill from the tap, and looks really inviting.
Which is lucky, because the first of my errors was to fail to put any kind of screen over the outlet at the bottom.
The result is that I might need to go for a swim.
 The next step involved not going to the hardware and plumbing stores any more to return, and re-buy everything.
Luckily I found this solution to deal with the transition between PVC and black poly pipe.
I tried all kinds of arrangements and only reluctantly remembered from my earlier solar hot water heater experiments that silicone doesn't stick to poly pipe.
These saved the day.
 They didn't actually fit the rest of the design or anything convenient like that, so I needed to file them down a bit.


And then had to file down the PVC linkage.
Until the adaptor nearly fit inside the PVC
 And then had to bash it with the flat side of a hammer.
 But then it fit perfectly.
 Then I had to trim it.
So it would fit into my 50mm PVC "T" junctions without taking up too much of distance between the fish tank, and the rear wall. I needed to add three taps so I could control the distribution of water throughout the system.
 The taps will be 25mm poly taps, and that's the point of this PVC to poly adapter.
 See.
See.
 The plan is to send some water to the original grow bed with one tap, to the two new constant flood grow beds with the second tap, and to the half inside, half outside tomato/mellon/pumpkin grow bed/duckweed tank with the last tap.
I included a bit of space so if needs be I could add another tap down the line by splicing it between the fish tank and the first tap.
 It looks like this inside.
I tried to minimise the potential traps where solid fish waste might collect.
 Each join has silicone jammed in all over the place.
I'm told the blue glue that you normally use on PVC plumbing is a better option, because you can unstick your work with the application of a bit of heat.
I went with the ever confident silicone.
I'm all about commitment.
 I stuck a stack more on the outside as well.
I really don't want to have any more leaks.
Fish hate leaks.
 The final product looked like this.
 Next up was to deal with the internals of the new grow bed.
I used a lot of silicone.
This is another transition point between whatever the blue barrel lid plastic is, and poly pipe.
Poly pipe doesn't like silicone, but there was an existing screw thread in the lid that only needed puncturing, and a poly pipe screw thread 25mm elbow fitting fit perfectly. I siliconed it a lot anyway.
 And then did the same to the outside.
 And then plumbed the barrel back to the old fish tank, now the sump.
 Next up was to create a media screen so the clay ball growing media in the grow bed doesn't try to escape into the plumbing.
After sawing and filing and sawing and sanding and bracing the half cut screen with a crazy arrangement of clamps, I discovered you can just cut 90mm PVC storm water pipe with scissors.
There's a hot tip.
Scissors.
 Then I drilled some holes in the media screen to let the water through, but keep the media out.
Round holes.
To keep the clay balls out but let the water through.
Round balls.
 And then placed the media screen over the drain hole, and started excitedly adding the clay balls.
A few fell through, but that was to be expected.
But for some reason, I didn't expect the round balls to sit in the round holes.
And block those holes.
 Perfectly.
Oh well that was error three.
Error three appeared just before error two, but I wasn't aware of error two at this stage.
 So I made this.
I made it out of something that looked almost identical to this before I started.
Only slightly longer.
Originally this was some back room shelving from a now defunct Adelaide department store called John Martin's. I got a very large quantity of it at auction for free.
Which is odd.
 The upright brace of the old shelving, coupled with two laundry baskets made a reasonable roost for half the new grow space.
The other half is yet to be made.
 I also have a tip.
If you want to really crank up the pressure on your ratchet clamps that seal your poly pipe to your poly elbows, you can squeeze with everything you've got...
 but if you are as feeble as me, you can use the handles of a pair of pliers to get that one last click out of them.
My pliers failed to be just quite large enough to get their jaws around the clips used for 25mm poly.
But the handles worked a treat.
 And the final result looked like this.
The wire you can see is one of two stainless steel wires I wrapped around the grow bed to stop it spreading.
And error number two was brought to light at 4am when I sat upright in bed and realised that ever after planing for just the right angle that the taps should depart the SLO to maintain an equal distribution of water to all three taps, for some crazy reason at the last minute, just after applying silicon, and just before going to bed, I thought I'd forget the plan, and tilt the tap "T" junctions down at an angle that would mean all the water would be biased toward the first tap.
 The original plan called for this.
Almost, but not quite flat.
Not quite, so fish solids wouldn't get trapped, but almost, so all taps would see similar flow.
 But for some reason I made this.
This would mean that I'd need to close the first tap right down, and make the path through it a perfect trap for fish solids.
I think.
 So at 4am, I suddenly sat up and ran outside to twist everything back into the correct angles.
The silicone seemed forgiving at the time, but only time will tell.
It shouldn't be an issue, because there's no pressure involved. If it leaks, I can just seal it from the outside with yet more silicone, but I think there is some kind of lesson to be learned about plans, and sticking to them.
I still don't know what that lesson might be, but I'm pretty sure it's there somewhere.
120 things in 20 years, where sometimes you can make a stack more room in your brain by posting all the accumulated stuff to do with an Aquaponics - System build
It went like this...

It's commonly called an IBC or International Bulk Container/Carrier.
They are used to freight liquid stuff all over the world, and there are a lot of them.
If you don't normally, wander down to your local dockyard or industrial/freight area, and you will be particularly amazed by two main things. First that we realy burn a lot of fuel in a lot of trucks, ship, planes, and trains, and second, we use a lot of containers to move all the stuff that we burn all the fuel for.
Many containers are used only once.
Mine brought honey from somewhere, and even has a heating element under it.
I bought them ages ago in a previous life on a farm.
It's a strange and disturbing thing to discover that we humans make single use containers with mains power cords protruding from them.
It's a little bit wrong me thinks.
But anyway, reusing one for an aquaponics system has got to be a good thing, and a lot of people have done so.
That thing leaning against it is my SLO or solids lifting overflow. Or at least that's what it will look like when I make it.
The point of it is to move the solid fish waste from the fish tank(where the fish don't want it any more because it smells and tastes bad), to the grow beds (where the plants would quite like it). A SLO is another thing that a lot of people have used.
A lot of people are very clever.
I know some of them.
I even call some of them friends.
I'm friends with clever people.
Which is nice.
So...
 the plan was to squeeze a one and a bit cubic metre fish tank into a 1.8 cubic metre grow house, and still have a stack of room left over for growing stuff.
In fact the ultimate goal was to squeeze a one and a bit cubic meter fish tank into a 1.8 cubic metre grow house, and still have 1.8 cubic metres of space left over to grow stuff in.
Tricky.

All I need now is something to wrap the bottom of the new fish tank in and nobody will be the wiser.
I think it looks better than the original, but that could be a dehydration issue.
It's really hot.
Or at least it's really hot in a growhouse when you are trying to fit big things into small spaces.

That's why you need a heater.
Heat makes honey runny.
Heat makes fish runny as well, but it doesn't taste so good afterwards.
So to make it so I could get the fish in and out, I drew a rectangle.
The best thing about drawing rectangles is that, once done, you can use the drawing as a guide to get a power saw involved.

I cut a hole as a thing to put your thumb in to act as a handle.
This rectangle is going to be a door soon.


I also drilled another hole along the line so I could put a jigsaw blade in to start the cut.
And then a few more holes to allow me to tie some fishing net mending line through to form a hinge.

I did that.
It nearly cuts straight!
Nearly.

And it still works.
But it's really loud, and shakes a lot.
Some would say the bearings are shot, but I say the name says it all.
It's meant to jig, and jig it does.


Not much sterner, but slightly.
The plastic is thicker than I thought, and less brittle.
It needed a little support to keep the jig saw from creating a friction fire, but it was easily dealt with by the addition of a trusty stick.
I choose a milled quarter round stick.

I suspect it seemed like hours because it actually was hours.
Apparently, after 20 years or so of frequent use, it seems it's best practice to buy a new blade.
Who knew.
Luckily, as mentioned previously, I strive for second best practice.

Oh hang on, yes it does.
It shows the newly revealed inside of the fish tank with the hatch sitting on the top.

One of the best things about working with plastics is how well all your tools work.
Even sand paper is satisfyingly productive to use.

String.

The point of the lid, is partly to give me some control over evaporation, but mainly so that I dont need to fish about with a net all day whenever I decide to foolishly use the top of the IBC as a work bench.

That's the frame just under the brand name.
The 90mm PVC pipe with the elbows on each end are to gently introduce the grow house fabric to it's new shape.
I used cable ties to connect the PVC directly to the IBC frame.
That should give a ton of security to the growhouse in windy weather.

Which is lucky, because the first of my errors was to fail to put any kind of screen over the outlet at the bottom.
The result is that I might need to go for a swim.

Luckily I found this solution to deal with the transition between PVC and black poly pipe.
I tried all kinds of arrangements and only reluctantly remembered from my earlier solar hot water heater experiments that silicone doesn't stick to poly pipe.
These saved the day.


And then had to file down the PVC linkage.
Until the adaptor nearly fit inside the PVC


So it would fit into my 50mm PVC "T" junctions without taking up too much of distance between the fish tank, and the rear wall. I needed to add three taps so I could control the distribution of water throughout the system.


I included a bit of space so if needs be I could add another tap down the line by splicing it between the fish tank and the first tap.

I tried to minimise the potential traps where solid fish waste might collect.

I'm told the blue glue that you normally use on PVC plumbing is a better option, because you can unstick your work with the application of a bit of heat.
I went with the ever confident silicone.
I'm all about commitment.

I really don't want to have any more leaks.
Fish hate leaks.


I used a lot of silicone.
This is another transition point between whatever the blue barrel lid plastic is, and poly pipe.
Poly pipe doesn't like silicone, but there was an existing screw thread in the lid that only needed puncturing, and a poly pipe screw thread 25mm elbow fitting fit perfectly. I siliconed it a lot anyway.


After sawing and filing and sawing and sanding and bracing the half cut screen with a crazy arrangement of clamps, I discovered you can just cut 90mm PVC storm water pipe with scissors.
There's a hot tip.
Scissors.

Round holes.
To keep the clay balls out but let the water through.
Round balls.

A few fell through, but that was to be expected.
But for some reason, I didn't expect the round balls to sit in the round holes.
And block those holes.

Oh well that was error three.
Error three appeared just before error two, but I wasn't aware of error two at this stage.

I made it out of something that looked almost identical to this before I started.
Only slightly longer.
Originally this was some back room shelving from a now defunct Adelaide department store called John Martin's. I got a very large quantity of it at auction for free.
Which is odd.

The other half is yet to be made.

If you want to really crank up the pressure on your ratchet clamps that seal your poly pipe to your poly elbows, you can squeeze with everything you've got...

My pliers failed to be just quite large enough to get their jaws around the clips used for 25mm poly.
But the handles worked a treat.

The wire you can see is one of two stainless steel wires I wrapped around the grow bed to stop it spreading.
And error number two was brought to light at 4am when I sat upright in bed and realised that ever after planing for just the right angle that the taps should depart the SLO to maintain an equal distribution of water to all three taps, for some crazy reason at the last minute, just after applying silicon, and just before going to bed, I thought I'd forget the plan, and tilt the tap "T" junctions down at an angle that would mean all the water would be biased toward the first tap.

Almost, but not quite flat.
Not quite, so fish solids wouldn't get trapped, but almost, so all taps would see similar flow.

This would mean that I'd need to close the first tap right down, and make the path through it a perfect trap for fish solids.
I think.

The silicone seemed forgiving at the time, but only time will tell.
It shouldn't be an issue, because there's no pressure involved. If it leaks, I can just seal it from the outside with yet more silicone, but I think there is some kind of lesson to be learned about plans, and sticking to them.
I still don't know what that lesson might be, but I'm pretty sure it's there somewhere.
120 things in 20 years, where sometimes you can make a stack more room in your brain by posting all the accumulated stuff to do with an Aquaponics - System build
Subscribe to:
Posts (Atom)
Popular Posts
-
 You see CHIFT PIST a lot in the aquaponics forums and it means "constant height in fish tank, pump in sump tank". And its a very g...
 -
 The bell siphon was a clever thing for someone to design, and as such you feel a bit of that "clever" rub off onto you when you m...
 -
 A "bell siphon" is a device that automates the flooding and draining of an aquaponics grow bed, even though the pump is adding wa...
 -
 Apparently, marron come in two varieties. Hairy and not so hairy. Cherax cainii (smooth) and Cherax tenuimanus, or Margret River marron (hai...
 -
 A while ago I tried to make a fish fed fish feeder design that would allow the fish to feed themselves. I think It's made. I say ...
 -
 Painting lures is easier if you don't know how. I don't, so I'm already well on my way. I started by owning a printer. That ...
 -
 The good thing about growing things like potatoes in aquaponics is they grow like crazy. The problem with growing things like potatoes in ...
 -
 If you pump air down into a submerged tube, when the bubbles rise to the surface, by virtue of the fact that they take up some space, they c...
 -
 Wire is one of the greats. It's power lies in its ability to be made shorter and apply great tension, with the application of many small...
 -
 With a little practice its possible to make a screw. If you bend your wire into an eyelet, its possible to make a screw in eyelet. The use...