It looks like my absurd strawberry has pretty much failed to do much of anything except go all floopy, and look a lot more like earth than it did a few days ago..
I was (of course) hoping it would change the world in some enormous way, but alas it was not to be.
On the up side, a few of my very healthy normal strawberry plants are actually doing quite well, and have started to send out yet more runners, so "normal" might turn out to be a pretty good approach after all.
I think This might be my first post without a photo, so given the strawberry has turned to what looks like earth, I'll post this pic in place of anything meaningful.
120 Things In 20 Years thinks the world might have slipped back into normal mode when it comes to strawberry propagation.
Showing posts with label FAIL. Show all posts
Showing posts with label FAIL. Show all posts
Fire - Quicker, more durable ethanol stove
A while back I made a pretty convincing ethanol camp stove out of a coke can.
 It worked well and looked like this when it was running.
I've used it a bit since then and it's definitely a practical addition to any backpack.
The problem is it's starting to show signs of aging. The can expands and contracts, and there is now a crease where extra gas flows giving an uneven flame.
In my model (also not my design) I used an inner sleeve with holes at the top to let the gas out. The result is that the trapped ethanol (spirit/alcohol/methanol) between the outside wall, and the inner wall boils the spirit, and creates a gas jet that looks a lot like a normal BBQ burner.
One of the problems was trying to get the top of a coke can to fit into the bottom of a coke can. It's tricky because (of course) they are the same size. It can be done, but involves gently stretching the outside one and it takes a lot of messing about.
Now I'm being pretty fussy here. The little burner works really well, but it did tend to leak fuel around creases that formed in the join between the top and the bottom sections.
Someone on a Stirling engine forum pointed me towards a different method of making one. This method involves no holes, but it just encourages those creases that mine developed by itself, and I think it might be a winner.
Their's also used a drink can, but I think it might make a more robust version if I used a tinned food can.
 So, to start with, I peeled a normal, every day food tin.
 The first step was to trim it to size.
I needed the top to fit into the bottom, so the first thing to do was punch a hole in it to enable a cutting tool to get in there.
I used that mystery tool that pocket knives have.
Probably a leather working tool or something.
Who knows, just punch a hole in the can.
 Next jam in some tin snips or something to make a nice cut to separate top from bottom.
My tin snips are stupid, so I ended up using scissors.
This isn't the best way to use scissors, so don't do this at home unless you actually own the scissors.
 One very good method of cutting a tin can, is to just tear it by grabbing a ragged tail of tin with a pair of pliers and twist. If there's a groove to follow, it actually makes a pretty straight cut.
 As I said, I ended up using scissors to trip everything to it was nice and neat.
I made the inside sleeve (the one on the left), slightly taller than the other so the pot could sit on the rim and let the gas escape from the gap between the outside sleeve.
 I bent a series of grooves in the base of the inner sleeve so that they would allow the flow of gas, and also allow the inside sleeve to fit inside the outside sleeve.
This was simply a case of grasping with pliers, and twisting them to the left, and slightly down toward the centre.
 Next I inverted the inside sleeve and carefully positioned the outside sleeve over it so that I might press the two together by stamping down with my foot.
 Which failed completely.

I've used it a bit since then and it's definitely a practical addition to any backpack.
The problem is it's starting to show signs of aging. The can expands and contracts, and there is now a crease where extra gas flows giving an uneven flame.
In my model (also not my design) I used an inner sleeve with holes at the top to let the gas out. The result is that the trapped ethanol (spirit/alcohol/methanol) between the outside wall, and the inner wall boils the spirit, and creates a gas jet that looks a lot like a normal BBQ burner.
One of the problems was trying to get the top of a coke can to fit into the bottom of a coke can. It's tricky because (of course) they are the same size. It can be done, but involves gently stretching the outside one and it takes a lot of messing about.
Now I'm being pretty fussy here. The little burner works really well, but it did tend to leak fuel around creases that formed in the join between the top and the bottom sections.
Someone on a Stirling engine forum pointed me towards a different method of making one. This method involves no holes, but it just encourages those creases that mine developed by itself, and I think it might be a winner.
Their's also used a drink can, but I think it might make a more robust version if I used a tinned food can.


I needed the top to fit into the bottom, so the first thing to do was punch a hole in it to enable a cutting tool to get in there.
I used that mystery tool that pocket knives have.
Probably a leather working tool or something.
Who knows, just punch a hole in the can.

My tin snips are stupid, so I ended up using scissors.
This isn't the best way to use scissors, so don't do this at home unless you actually own the scissors.
 One very good method of cutting a tin can, is to just tear it by grabbing a ragged tail of tin with a pair of pliers and twist. If there's a groove to follow, it actually makes a pretty straight cut.
I made the inside sleeve (the one on the left), slightly taller than the other so the pot could sit on the rim and let the gas escape from the gap between the outside sleeve.

This was simply a case of grasping with pliers, and twisting them to the left, and slightly down toward the centre.


Stirling engines - My first Stirling engine
Sometimes I struggle a bit with certain aspects of construction, but in this case I wasn't even certain of what I was attempting to construct.
Most of the problems trend around a certain frantic waste of pace and failure to pay attention to detail.
This time was no different.
 A Stirling engines basic list of components include a cylinder, a displacer, and a crankshaft.
They also include a hot bit, and a cold bit.
It's the difference between the hot bit and the cold bit that makes a Stirling engine an engine.
 There's also another really important bit, called the power piston. The power piston is connected to the same crank shaft, but on another crank. This crank is offset from the displacer's crank by 90 degrees.
I'm not really sure how it does what it does, but this is my first attempt at making a Stirling engine.
The power piston is the bit that's missing, because I didn't get that far.
Some of the other missing bits include the rest of the components that make up a Stirling engine.
120 Things in 20 years - On a scale of one to ten, where one is a total fail, and ten is a total success, I wouldn't bother rating my first attempt at making a Stirling engine.
Most of the problems trend around a certain frantic waste of pace and failure to pay attention to detail.
This time was no different.

They also include a hot bit, and a cold bit.
It's the difference between the hot bit and the cold bit that makes a Stirling engine an engine.

I'm not really sure how it does what it does, but this is my first attempt at making a Stirling engine.
The power piston is the bit that's missing, because I didn't get that far.
Some of the other missing bits include the rest of the components that make up a Stirling engine.
120 Things in 20 years - On a scale of one to ten, where one is a total fail, and ten is a total success, I wouldn't bother rating my first attempt at making a Stirling engine.
Aquaponics - Alf alfa sprout transplant test
I thought I'd test an alf alfa sprout transplant to see if there were going to be any issues.
The result was both a success and a fail.
 I started with some normal alf alfa sprouts pulled from my sprouter device.
I figured half a dozen would be a good number to test.
I thought perhaps the shock of going from my perfect humidity, no wind, no real temperature swings, sprouting device might make them all kick the bucket when dropped suddenly into my aquaponics system.
 The first one I planted was rested into a shallow hole made in the scoria. I figured I'd have to be pretty gentle with them because the scoria is a little rough.
I ate the rest, so I'm not sure this really qualifies as good science.
 But after covering it up it looked like this.
I'm not sure if this pic is right after he transplant or the next day, but either way it looked like this the next day.
It was planted in the hottest part of a reasonably hot day, so I think it can be claimed as successful.
 But the day after, it looked like this.
I had to dig around a bit to find it because whatever had eaten it, had eaten it down to beneath ground level.
I hate slugs.
120 Things in 20 years - And that folks, is why we should not eat the science, when testing sprout transplants in aquaponics.
The result was both a success and a fail.
I figured half a dozen would be a good number to test.
I thought perhaps the shock of going from my perfect humidity, no wind, no real temperature swings, sprouting device might make them all kick the bucket when dropped suddenly into my aquaponics system.
I ate the rest, so I'm not sure this really qualifies as good science.
I'm not sure if this pic is right after he transplant or the next day, but either way it looked like this the next day.
It was planted in the hottest part of a reasonably hot day, so I think it can be claimed as successful.
I had to dig around a bit to find it because whatever had eaten it, had eaten it down to beneath ground level.
I hate slugs.
120 Things in 20 years - And that folks, is why we should not eat the science, when testing sprout transplants in aquaponics.
Aquaponics - Loop siphon
Loop siphons are an interesting beast, so I'm going to have a look at them.
I am currently using either a plastic cup scrunched into the gap that I made too small for a proper siphon, or a small glass jar as a bell in my strawberry grow bed. The strawberries are suffering a bit and they don't look as healthy as the strawberry plants I put in the dirt.
We cant have that.
One of the problems with the scrunched plastic cup and small glass jar,was that they make the water level too low for the strawberry plants. What I needed was a normal every day siphon.
I suspect that people tend toward either bell siphons or loop siphons based on which one they got to work first. Now, I know bell siphons are better, but I don't know why I think that, so I built a proper loop siphon.
One that works.
 I started with this pile of junk and leftovers from other projects.
A pile of junk is always a good place to start.
 And I made this.
I didn't work.
In fact it's kind of difficult to see in this picture, because there really isn't anything that looks like a loop.
The reason I made it like this is because black poly pipe doesn't like to bend.
I suspect I could have made it work by messing about with the flow for a bit longer, but I thought I should make something a bit more conventional because it was, after all, for a blog post.
 So I made one that looked like this instead.
Much better.
And it also worked perfectly the first time without any adjustment
 It's still not quite conventional because it looks like this from the top.
Which isn't very loopy.
Anyway, it seems to be quite reliable, and I can see no reason why I wouldn't use another one in some future build.
Except...
for some reason it isn't as interesting as a bell siphon. For one thing it doesn't make any interesting noises. That could be a plus.
So.
It takes 13 and a half minutes to complete a full flood and drain cycle.
 When the grow bed is full, it begins at a trickle and stays that way for a round a minute.
This is the view looking down the media guard when the grow bed is full.
 After around a minute it triggers convincingly and starts to empty the bed faster than the water is being pumped into the bed (the pump is run continuously).
 Then when the grow bed's water level reaches the height of the outlet pipe, it gulps and burps a few times as it sucks in air and then stops after a minute or so of trying.
This is roughly at the 6 and a half minute mark, so half way through the cycle.
One frequent question is "How long should the flood and drain cycle be?", and after lots of reading and personal experiment, I can confidently say it doesn't matter.
But that's not entirely true.
You don't want your media to dry out, because the plants will die. And as far as over watering goes, you don't want plants that don't like to be too wet (I found strawberries and capsicum plants fall into this category).
So as a guide, I'd say anything between ten minutes and an hour and a half should be ok. aim for something in the middle, and don't care if you are a bit off.
As for loop siphons, a few things to remember are...
* don't make your loop too big because the pipe needs to seal with water to become a siphon, and a long gentle curve seems to work better. The longer it is, the less it will trigger in a nice decicive way. It will probably still work, but if your loop siphon is making lots of false starts it might need the loop to be tightened a bit. Mine loop is around 20cm in diameter, which is about as tight as garden hose likes to be bent.
*There is a range of flow at which a siphon will both trigger, and also stop. To make a siphon easy to calibrate, just add a tap to the water going into the grow bed. If it doesn't start, you need more flow. (or reduce the diameter of the loop tube), it it doesn't stop, you need less flow (or increase the size of the loop tube's diameter).
*Remember that if you have more than one grow bed, any adjustment to how much water you direct into one grow bed, will probably effect how much is going to the other.
 To get around this you can put a tap on a T junction so that, rather than the tap adjusting how much water goes into the grow bed directly, it adjusts how much water you divert back to the container where the pump is.
This is a good idea for any style of siphon if you have more than one grow bed.
The water that goes back to the sum just adds aeration to the water, so it isn't wasted.
Another use for the diverted water might be to feed a constant flood growbed, where the amount of water can vary without concern.
*It seems that the siphon triggers more decisively when the exit end is pointing straight down. The direction or angle of the entry end of the loop didn't seem to make any difference in my experiments.
My 500ml jug took 11.3 second to fill at the hose bringing water to the grow bed, and 5.1 seconds to fill at the pipe draining water out of the grow bed.
My siphon's loop is made from 12mm (internal) garden hose.
I don't think there is a lot of difference between a bell siphon, and a loop siphon. In future, I'll be using whichever one I feel like making at the time.
The only disadvantage I can think of is that if you were making a very large diameter on, the loop might be difficult to make because big pipe tends to be thick pipe, and think pipe doesn't like to bend. You could probably scale the loop up to any size, but the loop might take up a lot of space. A Bell siphon can be scaled up to any size and not take up a lot of space.
Advantages include that with a loop siphon, you can adjust your water depth in a grow bed simply by repositioning your loop a little higher (the top of the loop sets the grow bed water height), and a loop siphon is probably a bit cheaper to make.
120 Things in 20 years changed it's mind about loop siphons in aquaponics.
I am currently using either a plastic cup scrunched into the gap that I made too small for a proper siphon, or a small glass jar as a bell in my strawberry grow bed. The strawberries are suffering a bit and they don't look as healthy as the strawberry plants I put in the dirt.
We cant have that.
One of the problems with the scrunched plastic cup and small glass jar,was that they make the water level too low for the strawberry plants. What I needed was a normal every day siphon.
I suspect that people tend toward either bell siphons or loop siphons based on which one they got to work first. Now, I know bell siphons are better, but I don't know why I think that, so I built a proper loop siphon.
One that works.

A pile of junk is always a good place to start.

I didn't work.
In fact it's kind of difficult to see in this picture, because there really isn't anything that looks like a loop.
The reason I made it like this is because black poly pipe doesn't like to bend.
I suspect I could have made it work by messing about with the flow for a bit longer, but I thought I should make something a bit more conventional because it was, after all, for a blog post.

Much better.
And it also worked perfectly the first time without any adjustment

Which isn't very loopy.
Anyway, it seems to be quite reliable, and I can see no reason why I wouldn't use another one in some future build.
Except...
for some reason it isn't as interesting as a bell siphon. For one thing it doesn't make any interesting noises. That could be a plus.
So.
It takes 13 and a half minutes to complete a full flood and drain cycle.

This is the view looking down the media guard when the grow bed is full.

This is roughly at the 6 and a half minute mark, so half way through the cycle.
One frequent question is "How long should the flood and drain cycle be?", and after lots of reading and personal experiment, I can confidently say it doesn't matter.
But that's not entirely true.
You don't want your media to dry out, because the plants will die. And as far as over watering goes, you don't want plants that don't like to be too wet (I found strawberries and capsicum plants fall into this category).
So as a guide, I'd say anything between ten minutes and an hour and a half should be ok. aim for something in the middle, and don't care if you are a bit off.
As for loop siphons, a few things to remember are...
* don't make your loop too big because the pipe needs to seal with water to become a siphon, and a long gentle curve seems to work better. The longer it is, the less it will trigger in a nice decicive way. It will probably still work, but if your loop siphon is making lots of false starts it might need the loop to be tightened a bit. Mine loop is around 20cm in diameter, which is about as tight as garden hose likes to be bent.
*There is a range of flow at which a siphon will both trigger, and also stop. To make a siphon easy to calibrate, just add a tap to the water going into the grow bed. If it doesn't start, you need more flow. (or reduce the diameter of the loop tube), it it doesn't stop, you need less flow (or increase the size of the loop tube's diameter).
*Remember that if you have more than one grow bed, any adjustment to how much water you direct into one grow bed, will probably effect how much is going to the other.

This is a good idea for any style of siphon if you have more than one grow bed.
The water that goes back to the sum just adds aeration to the water, so it isn't wasted.
Another use for the diverted water might be to feed a constant flood growbed, where the amount of water can vary without concern.
*It seems that the siphon triggers more decisively when the exit end is pointing straight down. The direction or angle of the entry end of the loop didn't seem to make any difference in my experiments.
My 500ml jug took 11.3 second to fill at the hose bringing water to the grow bed, and 5.1 seconds to fill at the pipe draining water out of the grow bed.
My siphon's loop is made from 12mm (internal) garden hose.
I don't think there is a lot of difference between a bell siphon, and a loop siphon. In future, I'll be using whichever one I feel like making at the time.
The only disadvantage I can think of is that if you were making a very large diameter on, the loop might be difficult to make because big pipe tends to be thick pipe, and think pipe doesn't like to bend. You could probably scale the loop up to any size, but the loop might take up a lot of space. A Bell siphon can be scaled up to any size and not take up a lot of space.
Advantages include that with a loop siphon, you can adjust your water depth in a grow bed simply by repositioning your loop a little higher (the top of the loop sets the grow bed water height), and a loop siphon is probably a bit cheaper to make.
120 Things in 20 years changed it's mind about loop siphons in aquaponics.
Fire - Potato cooker mould
I guess it was bound to happen sooner or later, but my methanol potato cooker has gone mouldy.
 That happens to a lot of the truly great inventions.
I think.
Wasn't it Edison that said "Sometimes a perfectly good invention fails only because the potato always goes mouldy."?
I could be wrong.
I never took history.
 That happens to a lot of the truly great inventions.
I think.
Wasn't it Edison that said "Sometimes a perfectly good invention fails only because the potato always goes mouldy."?
I could be wrong.
I never took history.
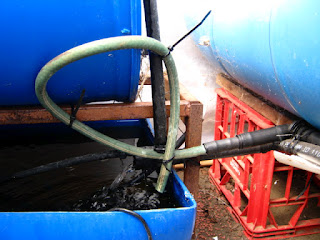
Aquaponics - Drip control
Waking up can be a difficult time even when you don't discover your aquaponics system's water trying to escape.
 But this morning it was extra tricky, because my water was falling out.
Trickier still, I couldn't figure out where it was escaping from.
This isn't something normal people have to contend with when operating an aquaponics system, this is just something special people like me have to contend with.
I'm special because I don't do things that I know I should.
 Normal people would design all pipes running into their system so that the water exited on a downwards pointing section.
Not me.
I like to have pipes pointing very slightly up, so that water runs back along the pipes.
That way when a drip finally forms and drops off the pipe, I can be sure it's left the confines of my system and falls unsafely onto the concrete.
 It's very easily solved, and the solution is one I've recommended to other people, just not one I actually put into practice for myself.
By far the most simple cure is to not have pipes sloping up (or even flat) at the point the water comes out, but if that's not possible for some reason, all you need is a place for a drip to form, and it stops being a problem.
 I used some cable ties to create the desired result.
Now when the water runs back it drips off at the cable tie, and the drip falls back into the water.
I knew at the time I put the pipes into position that I needed to make them face down, because I've seen (and personally suffered from) the problem before.
I have no idea why I didn't just add cable ties before. I didn't even have to think of it myself. I think a solution like this even has a name. ie its a product you can buy, or something people setting up stock troughs take in to account.
Oh well.
One day I'll make stuff that works properly, but I have to design a boat to live on for my attempt at an epic river journey, so I have no time for designing, and building stuff that works, or is actually reliable.
120 Things in 20 years - This Aquaponics drip control post puts me in a position where I can safely bet that my dear old mum buys me a better life jacket for my birthday.

Trickier still, I couldn't figure out where it was escaping from.
This isn't something normal people have to contend with when operating an aquaponics system, this is just something special people like me have to contend with.
I'm special because I don't do things that I know I should.

Not me.
I like to have pipes pointing very slightly up, so that water runs back along the pipes.
That way when a drip finally forms and drops off the pipe, I can be sure it's left the confines of my system and falls unsafely onto the concrete.

By far the most simple cure is to not have pipes sloping up (or even flat) at the point the water comes out, but if that's not possible for some reason, all you need is a place for a drip to form, and it stops being a problem.

Now when the water runs back it drips off at the cable tie, and the drip falls back into the water.
I knew at the time I put the pipes into position that I needed to make them face down, because I've seen (and personally suffered from) the problem before.
I have no idea why I didn't just add cable ties before. I didn't even have to think of it myself. I think a solution like this even has a name. ie its a product you can buy, or something people setting up stock troughs take in to account.
Oh well.
One day I'll make stuff that works properly, but I have to design a boat to live on for my attempt at an epic river journey, so I have no time for designing, and building stuff that works, or is actually reliable.
120 Things in 20 years - This Aquaponics drip control post puts me in a position where I can safely bet that my dear old mum buys me a better life jacket for my birthday.
Aquaponics - Cucumbric die back
Even though cucumbers are a summer thing, I feel an exception should be made for me.
I'm not sure why.
 It turns out you can safely turn your back on your aquaponics system for a while, but your summer veggies die in the middle of winter if you don't look at them every day.
I'll try again in a few months.
120 Things in 20 years The home of aquaponic cucumbric die back
I'm not sure why.

I'll try again in a few months.
120 Things in 20 years The home of aquaponic cucumbric die back
Thinking - Annoyed at myself
For ages I've held the belief that time travel is impossible based solely on the basis that if it were, there would be people from the future all over the place. Being irritating, and buying up all the shares in Miscosoft and 120 Things in 20 years.
And tourists.
Doing exactly what we would do if we could go back in time.
From fire, to the gun, to nukes, it's a given that eventually everyone with a screwdriver will eventually have the tech to make anything that can be made.
That was always my proof for why time travel was impossible. If it was possible, someone from the future would have come back and stolen my teeth or something because of some kind of future shortage of calcium... whatever.
But....
Someone interested in CERN made the comment that, like the telephone, perhaps time travel needs a second handset to be useful.
The first phone wasn't very useful until the second one was made.
"Hello? Saluton? Ahoy hoy'? Nope it simply doesnt work. It must be impossible."
What if people from the future cant come back to the past until a time machine is invented, and we leave a note to the future saying where it is, and when it will be switched on?
I still don't think we will be seeing visitors from the future, but I'm kicking myself for not thinking about the possibility that the only reason we don't see them now is because we haven't got around to building the other end of the connection.
How can I form an argument against something without all the facts?
Let that be a lesson to me.
When trying to learn 120 things in 20 years, and thinking about being annoyed at myself, I sometimes get annoyed at myself.
Bread - Yeast
So it seems yeast is a bit important to this bread making caper.
I made another loaf this morning and it once again looked ok, didn't rise much, and tasted like glue.
This time hard glue.
 It looked like this...
Actually it didn't taste like glue, but rather, tasted like really dense and chewy air.
You can see from the picture it didn't really rise, and I think I discovered why.
 This is a glass of warm water with three teaspoons of sugar, three teaspoons of flour, and a teaspoon of the yeast I've been using after it's been sitting for about half an hour.
 And this is the same concoction after 10 minutes, but with a freshly opened packet of yeast. The stuff I've been using has been sitting in a jar for a few years.
Apparently it goes off.
Given that the point of the yeast is to eat sugars and excrete carbon dioxide and alcohol (the alcohol evaporates out of the cooked bread but adds to the flavour), it's probably important to not be quite so dead. The carbon dioxide gets trapped in the bread dough and makes all the bubbles. This makes the bread rise and makes it light and fluffy. So dead yeast, it turns out, equals poorly risen bread.
At 120 Thing in 20 years, we learn from our mistakes when making bread with dead yeast. That's all welll and good, but I'm hungry.
I made another loaf this morning and it once again looked ok, didn't rise much, and tasted like glue.
This time hard glue.

Actually it didn't taste like glue, but rather, tasted like really dense and chewy air.
You can see from the picture it didn't really rise, and I think I discovered why.


Apparently it goes off.
Given that the point of the yeast is to eat sugars and excrete carbon dioxide and alcohol (the alcohol evaporates out of the cooked bread but adds to the flavour), it's probably important to not be quite so dead. The carbon dioxide gets trapped in the bread dough and makes all the bubbles. This makes the bread rise and makes it light and fluffy. So dead yeast, it turns out, equals poorly risen bread.
At 120 Thing in 20 years, we learn from our mistakes when making bread with dead yeast. That's all welll and good, but I'm hungry.
Fraudster - Over unity- free energy - seeks investment
There's gravity induced heat in my lunchbox, and it didn't cost me a cent
_________________________________________________________________________
This post is for someone named SuperVeg, and involves a challenge I made to invent the impossible a few days ago. Due to using all my money on better things, but mostly due to not really being into bets I cant win, the bet is for bragging rights only, and is open to all. The reality is, after I issued the challenge...
I'm going to run "over unity" through the invention engine and see what it comes up with.
As it's ultimate and final test, I bet (bragging rights only ) that it can come up with a device that you cant fault

I thought it might actually prove to be useful as a test of a fail condition.
For some years now I've been working on a formalised problem solving technique. It involves instructions, and processes to attempt to find a solution to a given problem. I call it "The Invention Engine". So far it's largely responsible for most of the inventions in this blog. You can see the difference between the ideas I have and the problems I pose and run through the invention engine. The invention engine ones seem to work.
But it wont this time.
The Invention Engine works like a flow chart or computer program. I put a problem in one end, and a solution falls out the other. So far the process is all in my head, but at some stage I'll publish it. Much of the invention engine itself was created by posing problems and running them through the unfinished engine. That's my favourite bit about the entire endeavour.
One problem with a system designed to find solutions to problems, is that there is no way of arriving at a position where the engine should report that something simply cant be done. I understand this will be an impossible hurdle to overcome, but thought I should put the question through the engine itself anyway.
How can I create a system that can test for "must fail" conditions?
The results of that inquiry required me to put a few different ideas through a test to see how they faired. The best test I could come up with was one that I knew would fail.
I ran a few known impossibilities like tuning water into beer and perpetual motion. I also ran free energy through the engine. Free energy and perpetual motion tend to go hand in hand, but they are not the same thing.
Perpetual motion is impossible because someone named Newton made a law against it. All the good things are illegal. There is an aspect to the universe that tends toward refusing a free lunch. But there are some ways to dodge around the system.
For instance, a hydro electric power plant uses the potential energy of a stack of water sitting high up in some mountains to generate electricity. If you had to pump the water back up the mountain after you generated some electricity from it, you would end up with an electricity bill. Electricity generating companies hate it when they get a bill at the end of the month because it makes them look incompetent. Luckily there is a convenient natural system to get all that water back up the hill for free so you can do it all again. It's kind of free energy, and its also kind of perpetual motion. If you stuck the entire system in a glass dome, it would keep working. But it uses the sun to power it. It's the sun that sticks all that water back up into the tops of the mountains. Evaporation looks free, but it comes at great expense. If I had to pay the power bill for the sun, it would really put a dent in my lifestyle.
Dents aren't free. And sometimes you just don't have a handy river sitting high up in a mountain.
So this entire free lunch electricity generating thing looks like a winner in the "things that are bound to fail if I run them through the engine" competition. I can ask the question and test the system in a hope that the methods I have identified really will let me know when something simply cant be done. I haven't actually identified a method of identifying that a given thing is impossible, but I have to start somewhere.
What I do have is some half baked ideas to test.
So I ran "I want some genuinely free renewable energy that doesn't require the sun to be there at all". That should at least give me a proven "no can do" to test my ideas against.
But...
I got this instead.
please stay with me on this if you are someone who can string together a thought that can hold up to scientific scrutiny. I'm happy to have this fall over, but cant see where it does.
All good perpetual motion engines need a decent name so I'll call this one Bob. Or Bob 3000.
Find a 200 metre high hill.
Build a cable car system on it.
Stick five liquid refrigerant filled gas tankers on the down cable at regular intervals, and five empty gas tankers on the up cable.
Attach a few generators from the turnstile at the top of the system.
Run a gas line from the bottom of the hill to the top.
Plug a compressor into the gas line at the top of the hill.
Generally speaking, the plan is to generate electricity from the potential energy stored because some liquefied gas is sitting at the top of a hill. In this respect, Bob 3000 is a lot like a hydro electric power plant. The generators are placed on either the top or bottom pulley that carry the cable, or both as is convenient.
To get the gas back to the top of the hill, we release it into a large diameter gas line at the bottom that is already filled with gas. When it turns from a liquid into a gas, it fills the gas line. The gas line is a sealed system that allows the liquefied refrigerant barely enough freedom to only just turn gaseous. ie it remains under a great deal of pressure even when in the pipe.
As the full gas tanker moves down the hill it weighs say 100 tons.
The empty ones weigh, for the sake of mathematical ease, 20 tones.
So we have 500 tons coming down the hill and 100 going up.
Now lets call 400 tones falling from 200 metres approximately one shi?load of energy (where one shi?load is a unit of measurement known only to me)
Compressors use a stack of energy to compress gas, and tend to be not very efficient. But the plan here is to start with gas that's already almost a liquid, so we have a bit of a head start.
But there's no such thing as a free lunch, so lets say it takes two shi?loads of energy to compress the gas back into a liquid at the top of the hill to make the system keep moving, and it produces only one shi?load of power.
1S - 2S = (grumpy shareholders)
But here's the bit that the invention engine spat out on the third pass...
Just triple the height of the hill.
Normally if you were, say, pumping water back up hill to use for hydroelectricity, if you double the height of the hill, you double the energy costs to the system, but in this system the additional costs almost amount to not very much at all. A bit of friction at each end of the cables, and some in the pipes is about all. The gas in the pipes almost finds its own way to the top of the hill. The compressor still uses almost the same amount of energy. The only real difference is the weight of the cable. And the additional weight on the upside is counteracted by the additional weight on the downside. The result is thrice the power generated, but with only a tiny additional energy cost.
Our shareholders now see 3S - 2S = (happy shareholders + that Nobel prize I've always wanted, and some serious karmic credit for giving away a multi-trillion dollar invention and saving the world)
Now as I said, I'm happy for this impossible invention to be knocked over, and fully expect it to be. To this end I have invited a few people to do so. But I personally cant figure out where the problem is. I'm actually really keen to learn where it lies.
Even the invention engine cant find a problem.
It will be the invention engine's first failure, but as stated the final solution was supposed to be impossible, so please, I invite everyone to find where it falls over. Even if all you have is a vague feeling, drop in comment or send me an email so I can explore it a bit.
You'll have to guess my gmail account as your first test.
120 things in 20 years - taking fraud into the realm of honesty with "Fraudster - Over unity- free energy - seeks investment" posts.
Bread - Hope Loaf
Just a word of warning for anyone new to this blog (and me in general). I have no idea if this is going to work or not. I'm making it up as I go along, and as many of the things I do fail as succeed. So if you're doing a fundraiser, thought you'd make sixteen hundred rolls to sell for a dollar each, and feel it might be important for it to work the first time, this may not be the place for you.
I started watching some videos, and reading up on bread, but got to that inevitable stage where I just have to have a go and see what happens.
Sometimes you just cant really tell what everyone is on about until you at least discover which bits are important, and which might just be decoration.
So I thought I'd make a small white bread loaf.
Actually this is unfolding in real time. Just like that old hit TV show 24.
But with more bread.
So if you get bored at any stage, try opening four different windows and read four different pages of my blog simultaneously.
So far this has happened...
 I started with some bread making flour.
I thought all flour was for making bread, but some must be for cake or for mixing with egg and throwing at politicians.
I secretly suspect it's all the same but I know a politician, so I'll find out later and let you know the truth of it all.
It seems like a pretty rational thing to do to place the ingredients into a bowl, but I saw a video where someone just mixed on a slab of wood.
I thought they looked slightly more like they knew some kind of secret, as compared to the others, so I went with the slab of wood method.
[Note from the future - It turned out to work just fine. (the mixing that is. I have no idea yet about the loaf) ]
 I made a bit of a well in the centre and added some yeast.
See the way I worked "well" in casually, just like someone who knows stuff!
That's about a cup of flour and I'm hoping, exactly the correct amount of yeast.
 And a pinch of salt.
You cant really see it, and you cant really tell how much I added, but I kind of liked the textural quality of the photo.
I've read a few bread recipes over the last 24* hours and I am amazed at how much salt everyone is adding.
My little loaf has a pinch, but I've seen recipes that call for a tablespoon for a dough to make two loaves. Unless there are radically different sized table spoons in some parts of the world that I don't know about, it seems a little too much.
 The next step, or at least my next step, is to hold the camera in one hand, and slowly add water with the other, whilst squishing it all together with the last, in the hope that it turns into dough.
 Which surprisingly it did a bit.
 Then a bit more.
I kept adding a splash of water as the hand full of dough picked up more and more of the flour.
 After a minute or two of adding water and poking the dough around, it seemed to be taking shape.
 From this point, I just worked it around a bit and picked up the remaining loose flour from the slab, until it looked like this.
Its a bit like dough, but a bit crumbly in texture and seems to be something made of flour and water. That is you can still see the flour.
So I started kneading.
Unfortunately I started kneading like my school art teacher told me to knead clay, so I'm not sure how that's going to work. [Note from the future - The bread is currently rising, and I'm researching the next step and find that I should be kneading slightly differently. From what I can gather I should be kneading, then rotating, then kneading then rotating. But who knows.]
 After a while it looked like this.
It's seems to be starting to take on a different texture, and seems to be much more unified and less floury.
I figure I'll knead until it stops changing.
 I got bored (tired) and felt that this was as good a time as any to stop.
I think it's worked so far, although it seems a little stiff.
Perhaps more water should have been added, but I don't think I can add it now so I'll just stick with what I have.
I shaped it as lovingly as I could and made it nice and smooth on the top by gathering the dough and pulling it under itself.
 It's a cold day here today, so I turned Mrs 120 Things in 20 years's coffee machine on.
For some crazy reason it has a cup warmer on the top, but as it turns out, this might be just the place for making my dough do the rising thing.
I put cling wrap over the top because the internet told me to.
 Those of you who read this blog regularly, will know that I think that if a job's worth doing, it's worth taking it's temperature, so I stuck a digital temperature probe in with the dough to see what I could see.
I'm not sure 22c is warm enough.
So I thought I'd put my latest theory to the test - That being that the house wouldn't burn down if I stuck a stack of tea towels over the coffee machine's cup warmer.
Only time will tell, but at least I'll have an ongoing record of the temperature thanks to the digital probe.
That should at least help with forensics.
Having covered the apparatus, I thought I'd do some quick research and see what temperature I should really be doing this rising thing at, and have decided that 25c or so is about right, so I wasn't so far off after all.
Also it seems that covering it with towels hasn't done anything. I'm guessing that's just because there must be a thermostat in the coffee maker that holds the temperature at 22c.
We live and fail and learn. But the house didn't burn down.
Which is nice.
 It's later, and I've returned to my bread to see the temperature is now sitting at 28c, which I think is still within the good range for the yeast.
But...
 Having unwrapped it, I don't think it's really done a lot as far as doubling in size.
Perhaps it did something else while I was away instead.
 I followed my shallow research's advice (my research was shallow, I don't have a shallow researcher**) and knocked the non-existent air out of it, and then shaped it into something slightly longer, thinner, and more numerous.
And now I wait.
And peek.
And wait.
*
It's later still - I just had another peek and it appears to be working. The only (and obvious in hindsight (but I wasn't really expecting success)) problem, is that if they rise much more they will turn into a single loaf. For this reason I've decided a "Hope Loaf" is now a thing, and will always be made out of four equal lengths, formed together into a single square loaf representing something important.
And square.
I've been doing yet more research in the waiting time, and it seems that the last thing you want to have happen is for a skin to form on your dough as it tries to rise. Apparently it restricts it's ability to move freely in four dimensions. I think perhaps my loaf was just too firm and didn't have the required give, but during the second kneading and shaping, it seemed a bit softer and a little looser. I've heard the word "rest" tossed around in recipes and online, so perhaps it's one of those things that should be listened to.
As usual I'll let you know if it turns out to be important.
I changed my mind. Not about letting you know, but about the bread,
 I got a bit worried that I wouldn't be able to get the final mono-loaf out of the bowl, so I removed them individually while I still could, and laid them out on top of the coffee machine on some baking paper. That way I can transfer them to the oven without having to pick them up.
As you can see they got a bit distorted, but I think they will bounce back.
They seem softer again. Perhaps as their structure is broken up by the air bubbles, it's weakening it, but it really seems wetter.
But remember, I have no idea what I'm doing.
For those of you who are temperature interested, the temperature of the stainless steel cup warmer is 32c when tested directly on the surface.
! > I'm baking
Drum roll please......
I made this...

It tastes almost exactly like glue!
120 Things in 20 years - Bread - Hope Loaf. You have to start somewhere, and visuals are as good a place as any right? Right?
*Now might be a good time to divide the screen into 4
**Yet
I started watching some videos, and reading up on bread, but got to that inevitable stage where I just have to have a go and see what happens.
Sometimes you just cant really tell what everyone is on about until you at least discover which bits are important, and which might just be decoration.
So I thought I'd make a small white bread loaf.
Actually this is unfolding in real time. Just like that old hit TV show 24.
But with more bread.
So if you get bored at any stage, try opening four different windows and read four different pages of my blog simultaneously.
So far this has happened...

I thought all flour was for making bread, but some must be for cake or for mixing with egg and throwing at politicians.
I secretly suspect it's all the same but I know a politician, so I'll find out later and let you know the truth of it all.
It seems like a pretty rational thing to do to place the ingredients into a bowl, but I saw a video where someone just mixed on a slab of wood.
I thought they looked slightly more like they knew some kind of secret, as compared to the others, so I went with the slab of wood method.
[Note from the future - It turned out to work just fine. (the mixing that is. I have no idea yet about the loaf) ]

See the way I worked "well" in casually, just like someone who knows stuff!
That's about a cup of flour and I'm hoping, exactly the correct amount of yeast.

You cant really see it, and you cant really tell how much I added, but I kind of liked the textural quality of the photo.
I've read a few bread recipes over the last 24* hours and I am amazed at how much salt everyone is adding.
My little loaf has a pinch, but I've seen recipes that call for a tablespoon for a dough to make two loaves. Unless there are radically different sized table spoons in some parts of the world that I don't know about, it seems a little too much.


I kept adding a splash of water as the hand full of dough picked up more and more of the flour.


Its a bit like dough, but a bit crumbly in texture and seems to be something made of flour and water. That is you can still see the flour.
So I started kneading.
Unfortunately I started kneading like my school art teacher told me to knead clay, so I'm not sure how that's going to work. [Note from the future - The bread is currently rising, and I'm researching the next step and find that I should be kneading slightly differently. From what I can gather I should be kneading, then rotating, then kneading then rotating. But who knows.]

It's seems to be starting to take on a different texture, and seems to be much more unified and less floury.
I figure I'll knead until it stops changing.

I think it's worked so far, although it seems a little stiff.
Perhaps more water should have been added, but I don't think I can add it now so I'll just stick with what I have.
I shaped it as lovingly as I could and made it nice and smooth on the top by gathering the dough and pulling it under itself.

For some crazy reason it has a cup warmer on the top, but as it turns out, this might be just the place for making my dough do the rising thing.
I put cling wrap over the top because the internet told me to.

I'm not sure 22c is warm enough.
So I thought I'd put my latest theory to the test - That being that the house wouldn't burn down if I stuck a stack of tea towels over the coffee machine's cup warmer.
Only time will tell, but at least I'll have an ongoing record of the temperature thanks to the digital probe.
That should at least help with forensics.
Having covered the apparatus, I thought I'd do some quick research and see what temperature I should really be doing this rising thing at, and have decided that 25c or so is about right, so I wasn't so far off after all.
Also it seems that covering it with towels hasn't done anything. I'm guessing that's just because there must be a thermostat in the coffee maker that holds the temperature at 22c.
We live and fail and learn. But the house didn't burn down.
Which is nice.

But...

Perhaps it did something else while I was away instead.

And now I wait.
And peek.
And wait.
*
It's later still - I just had another peek and it appears to be working. The only (and obvious in hindsight (but I wasn't really expecting success)) problem, is that if they rise much more they will turn into a single loaf. For this reason I've decided a "Hope Loaf" is now a thing, and will always be made out of four equal lengths, formed together into a single square loaf representing something important.
And square.
I've been doing yet more research in the waiting time, and it seems that the last thing you want to have happen is for a skin to form on your dough as it tries to rise. Apparently it restricts it's ability to move freely in four dimensions. I think perhaps my loaf was just too firm and didn't have the required give, but during the second kneading and shaping, it seemed a bit softer and a little looser. I've heard the word "rest" tossed around in recipes and online, so perhaps it's one of those things that should be listened to.
As usual I'll let you know if it turns out to be important.
I changed my mind. Not about letting you know, but about the bread,

As you can see they got a bit distorted, but I think they will bounce back.
They seem softer again. Perhaps as their structure is broken up by the air bubbles, it's weakening it, but it really seems wetter.
But remember, I have no idea what I'm doing.
For those of you who are temperature interested, the temperature of the stainless steel cup warmer is 32c when tested directly on the surface.
! > I'm baking
Drum roll please......
I made this...

It tastes almost exactly like glue!
120 Things in 20 years - Bread - Hope Loaf. You have to start somewhere, and visuals are as good a place as any right? Right?
*Now might be a good time to divide the screen into 4
**Yet
Subscribe to:
Posts (Atom)
Popular Posts
-
 You see CHIFT PIST a lot in the aquaponics forums and it means "constant height in fish tank, pump in sump tank". And its a very g...
 -
 The bell siphon was a clever thing for someone to design, and as such you feel a bit of that "clever" rub off onto you when you m...
 -
 A "bell siphon" is a device that automates the flooding and draining of an aquaponics grow bed, even though the pump is adding wa...
 -
 Apparently, marron come in two varieties. Hairy and not so hairy. Cherax cainii (smooth) and Cherax tenuimanus, or Margret River marron (hai...
 -
 A while ago I tried to make a fish fed fish feeder design that would allow the fish to feed themselves. I think It's made. I say ...
 -
 Painting lures is easier if you don't know how. I don't, so I'm already well on my way. I started by owning a printer. That ...
 -
 The good thing about growing things like potatoes in aquaponics is they grow like crazy. The problem with growing things like potatoes in ...
 -
 If you pump air down into a submerged tube, when the bubbles rise to the surface, by virtue of the fact that they take up some space, they c...
 -
 Wire is one of the greats. It's power lies in its ability to be made shorter and apply great tension, with the application of many small...
 -
 With a little practice its possible to make a screw. If you bend your wire into an eyelet, its possible to make a screw in eyelet. The use...